What is an Account?
In Solar Saral Vyapar, an Account represents an established business entity, company, or vendor that you engage with. It is the central record for managing all of your interactions with that business.
Instead of relying on isolated Leads (which are more common for B2C interactions), the B2B model centers around Accounts. Once an Account is created, it serves as the parent container where you attach multiple Contacts (employees of that business), Addresses (shipping/billing locations), and process their Quotes and Orders.
Interactive Demo & Audio Narration
View Narration Transcript
1. Creating an Account
To register a new B2B business in your CRM, you must create an Account. This serves as the central hub for all transactions and communications with that business.
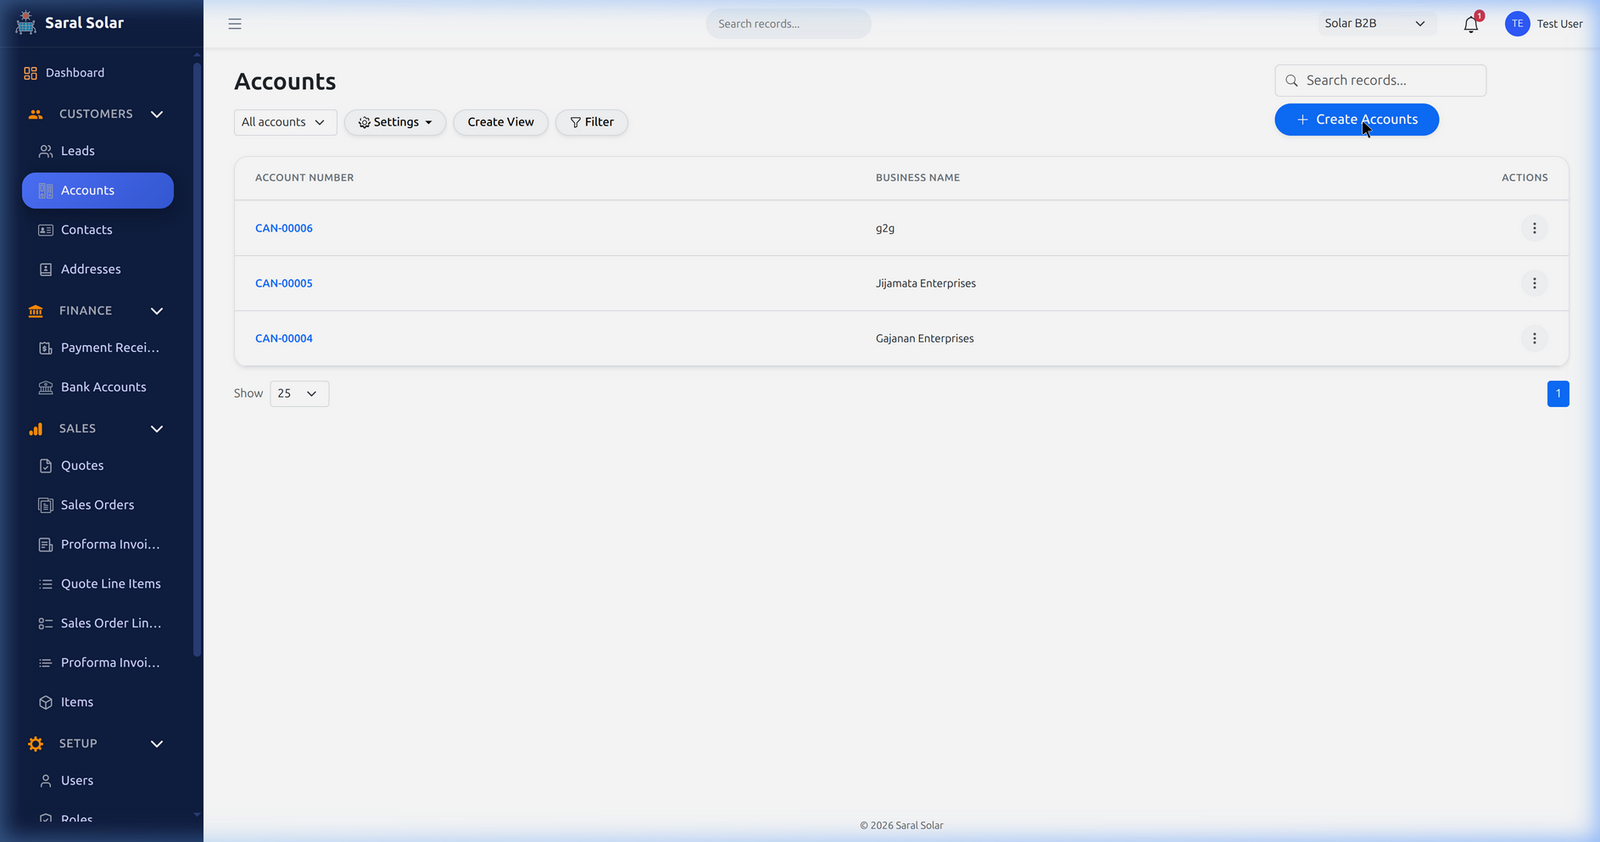
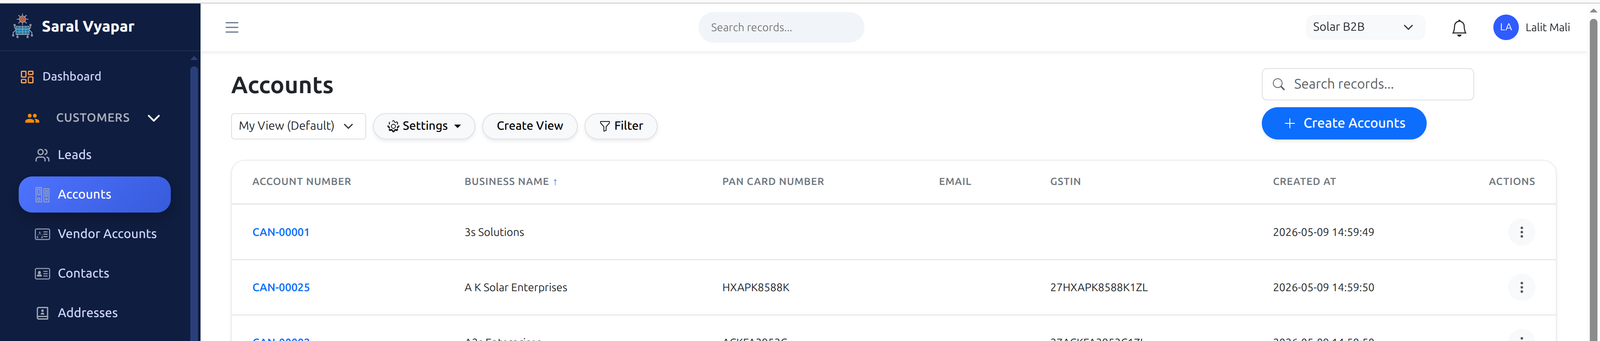
- In the left sidebar, under the CUSTOMERS section, click on Accounts.
- Click the blue Create Accounts button at the top right of the list view.
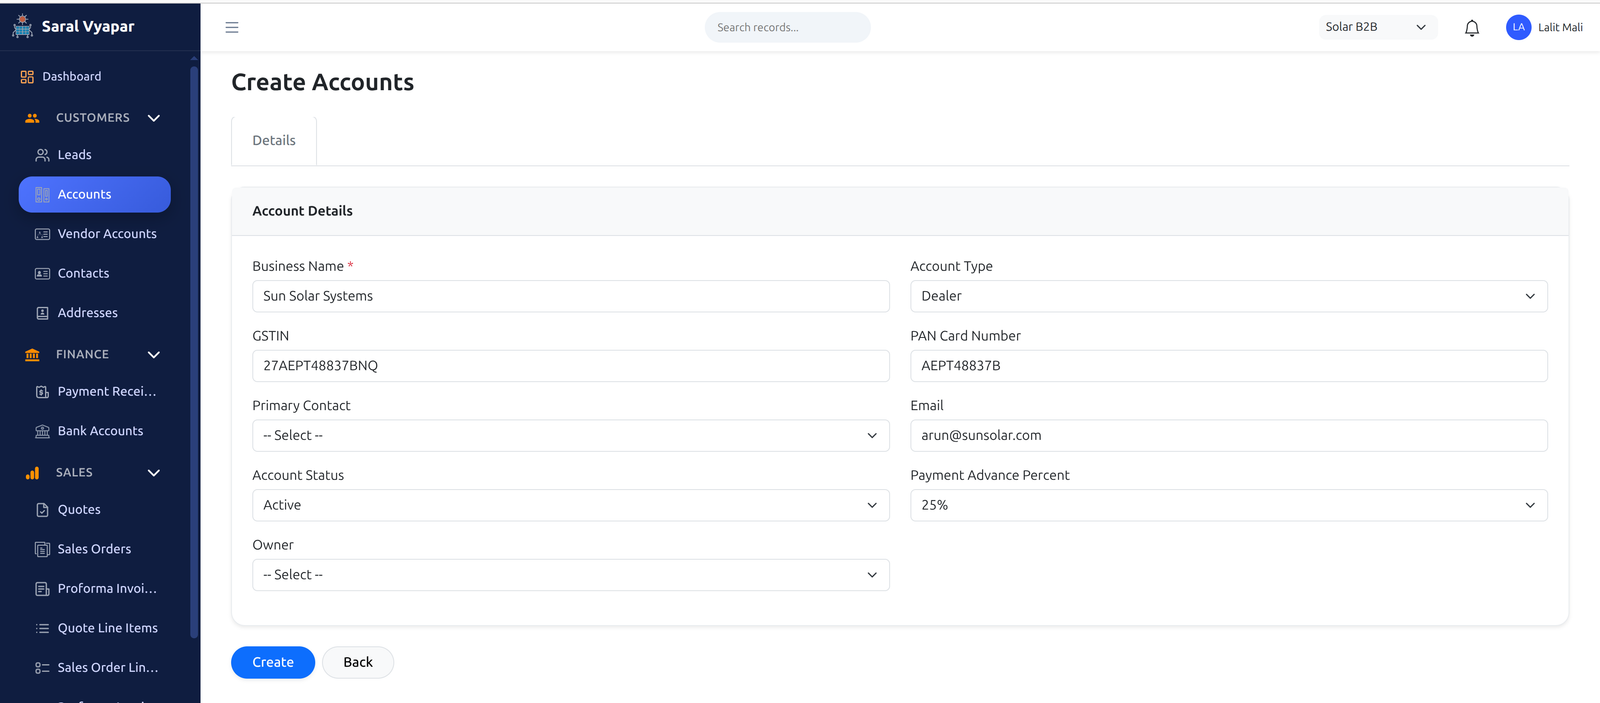
- Fill in the mandatory details. Note: Skip the primary contact while creating the account for the first time.
Key Input Fields Details
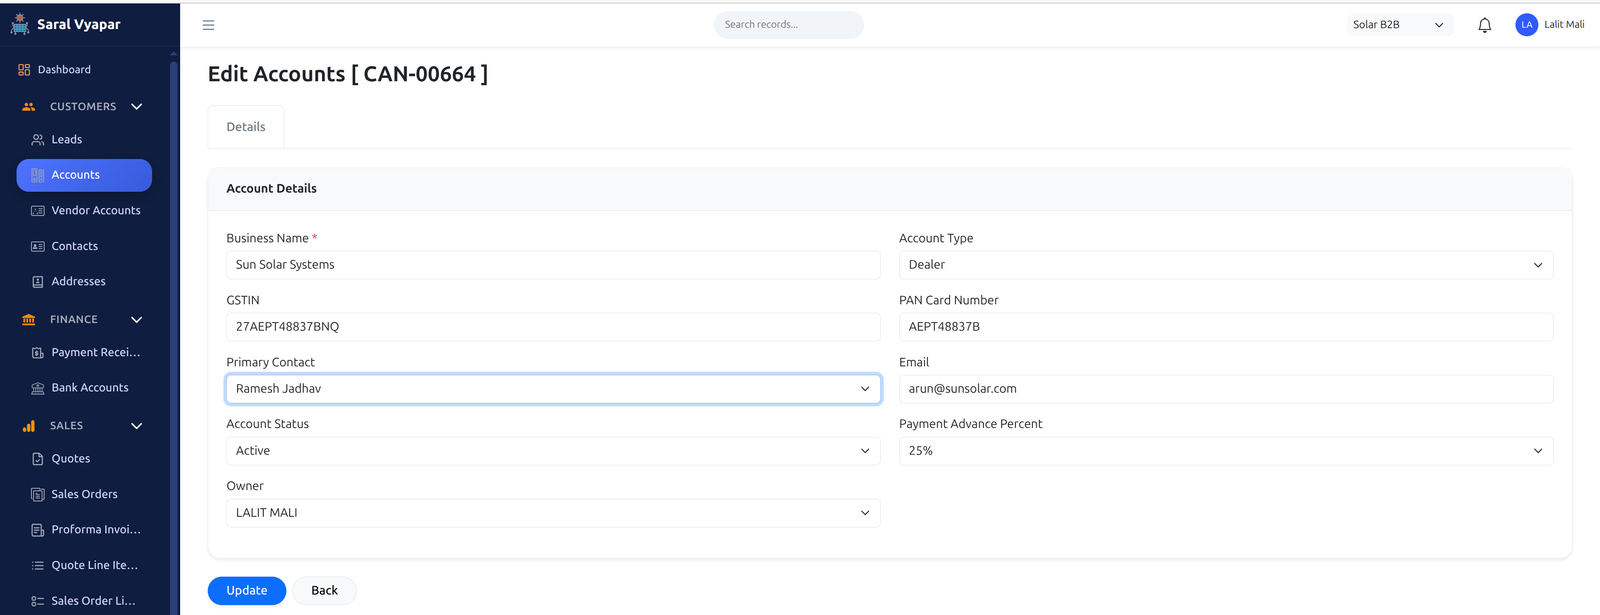
- Business Name (Mandatory): The legally registered name of the company or agency you are doing business with.
- Account Type: Categorizes the account (e.g., Dealer, Customer, Vendor) to help filter and manage them efficiently.
- GSTIN & PAN Card Number: Essential tax identification details for accurate billing and invoicing.
- Primary Contact: Dropdown to link a specific person to the account. (Leave blank during initial creation).
- Email: The primary contact email address for the business entity.
- Account Status: Indicates if the account is currently 'Active' or inactive.
- Payment Advance Percent: Defines the standard advance payment required (e.g., 25%) for this specific account.
- Owner: This field indicates the user creating the account in the CRM (the person responsible for handling the customer from your team, not the business owner of the client). If left blank, the logged-in user is automatically assigned.
- Click the Create button to save the account.
2. Exploring Account Details & Tabs
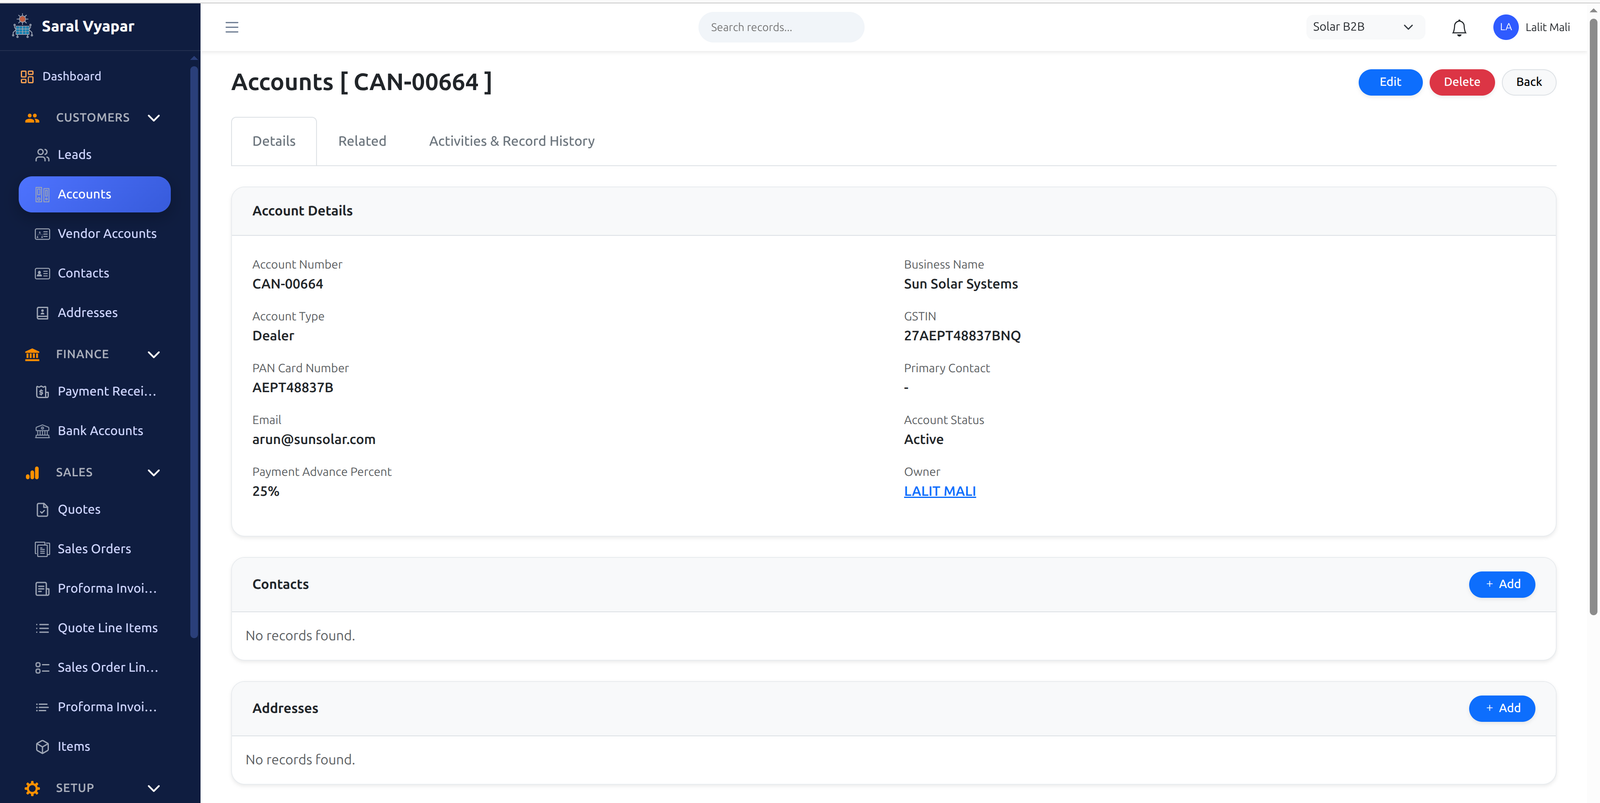
Once the account is successfully created, you will see a confirmation and be taken to its Details page. Here you can find a comprehensive view of the customer's interactions and related records.
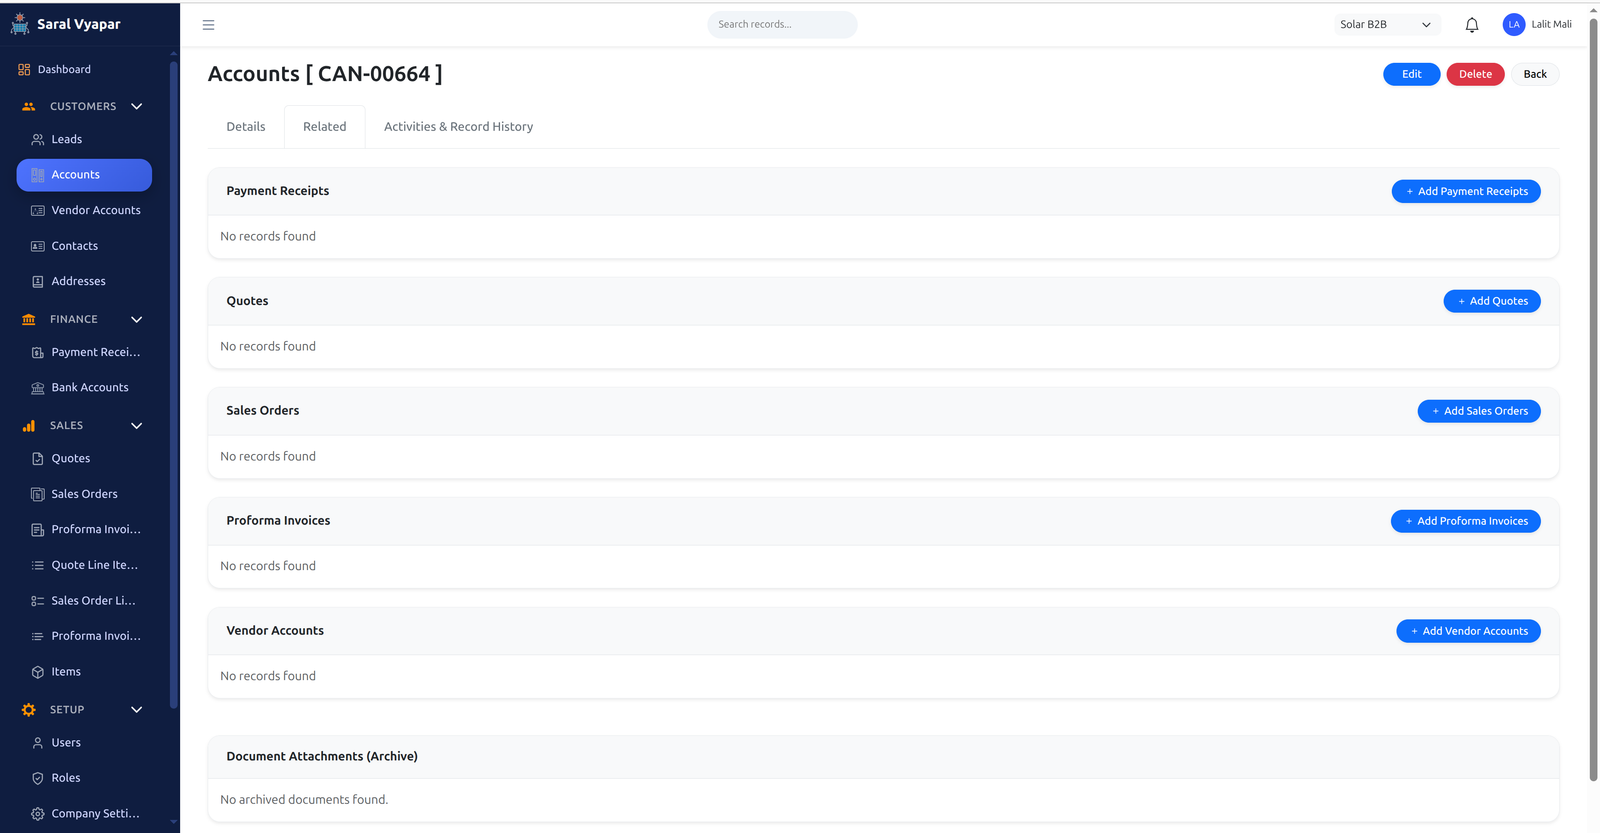
Related Tab
The Related tab displays all the Quotes, Proforma Invoices (PI), and Sales Orders associated with that account. This section is primarily used for viewing linked records quickly.
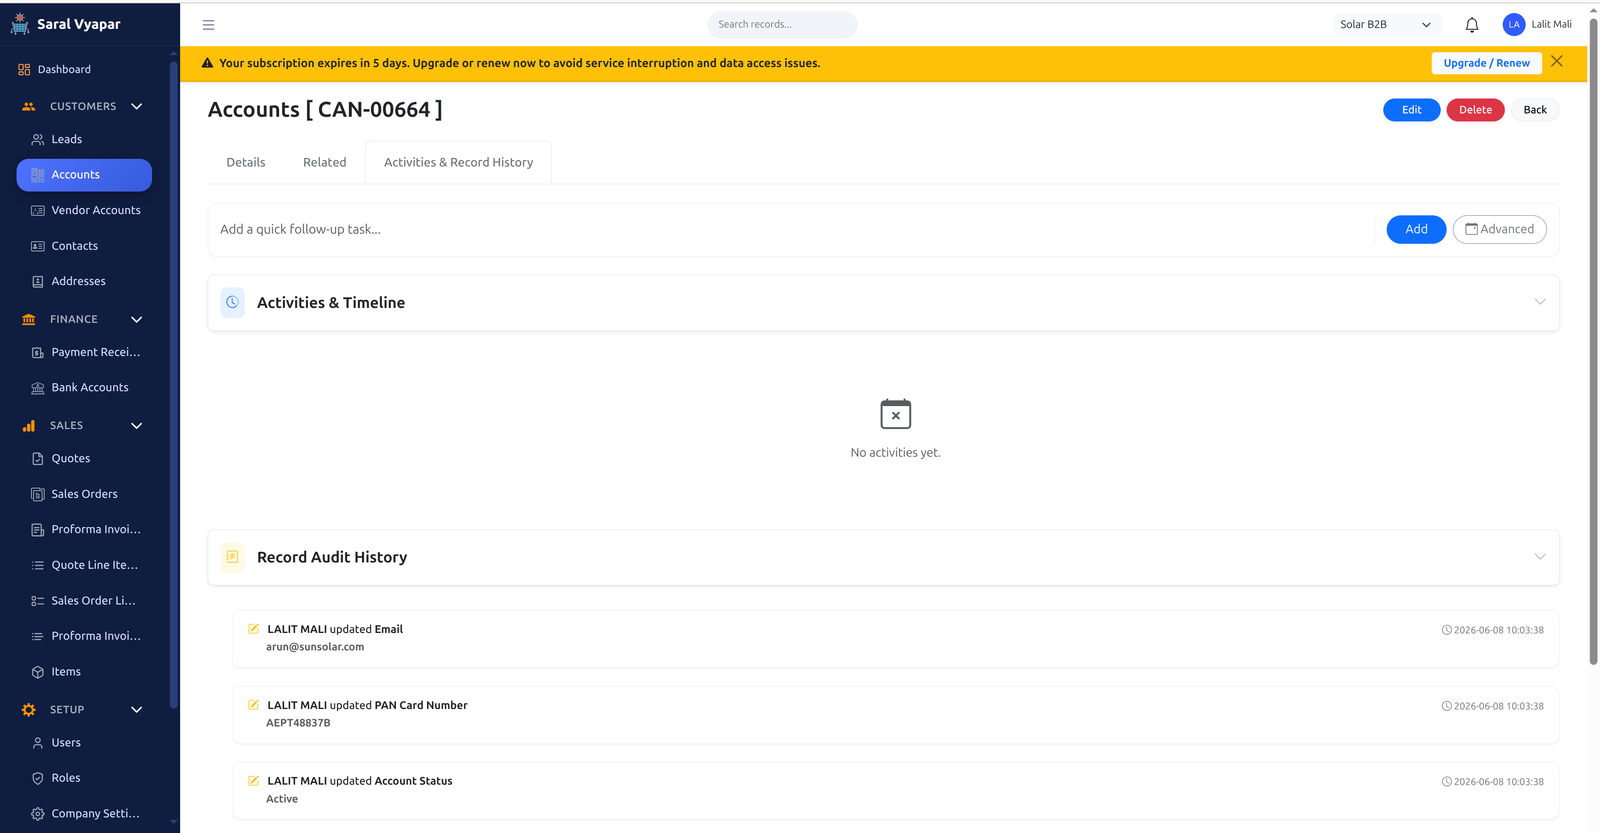
Activities Tab
The Activities tab shows a timeline of what activities have been performed. You can also use it to add follow-up reminders, log calls, and schedule meetings.
3. Adding and Linking Contacts
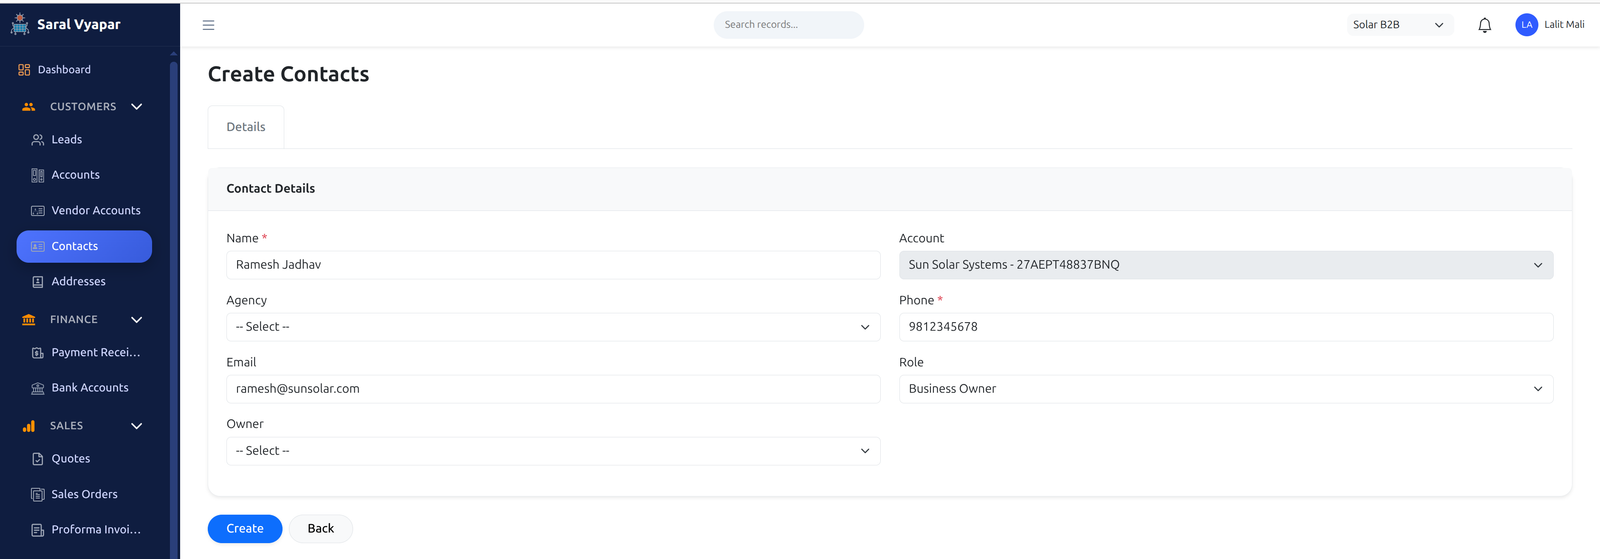
You can add multiple contacts to a single account, but only one can be linked as the Primary Contact.
- On the Account Details page, navigate to the Contacts section and click Add.
- Fill out the new contact's details and save.
- To set this contact as the primary one, Edit the Account itself.
- From the Primary Contact dropdown, select the contact you just created.
4. Linking Addresses
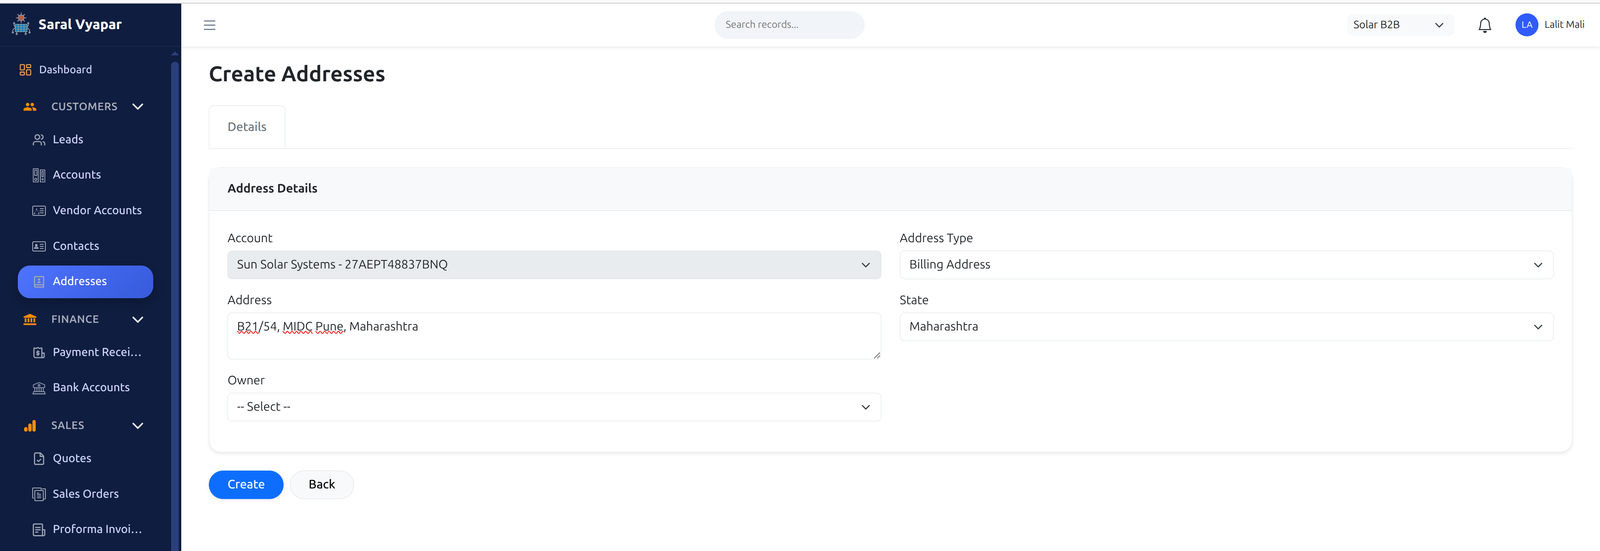
A single account can have multiple addresses (e.g., Billing and Shipping). Sometimes new shipping addresses need to be added to the same account later. It's best to add these directly from the Account Details page and Related tab to ensure proper linking.
- On the Account Details page, find the Addresses section.
- Click the Add button.
- Select the Address Type and enter the details.
- Click Create to link this address.
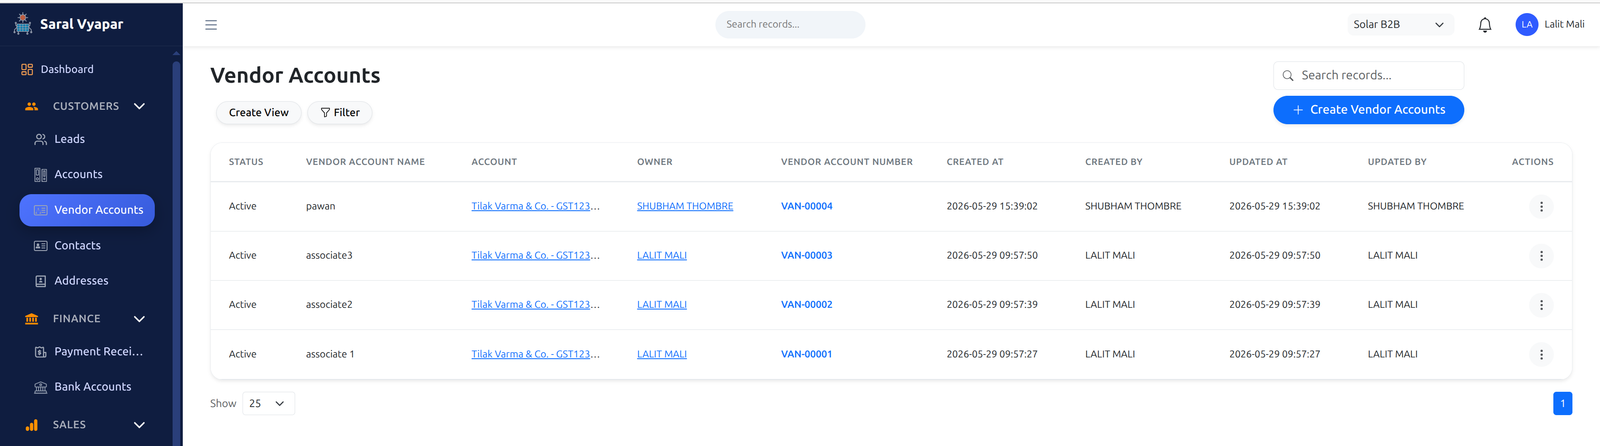
5. Creating Vendor/Agency Accounts
Sometimes multiple agencies (vendors) work under a single business entity, or they bring business to you. Tracking billing, quotes, and payments for them can be difficult. To simplify this, we create Vendor Accounts.
- In the left sidebar, click on Vendor Account.
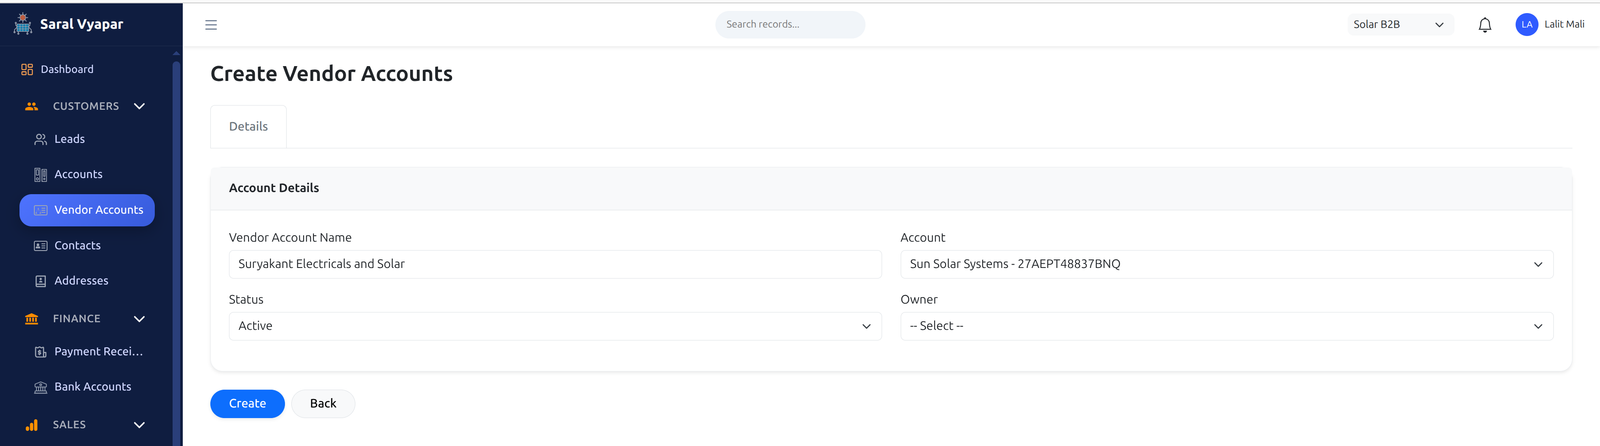
- Click the Create Vendor Account button.
- In the vendor addition form, enter the Vendor Name.
- Crucially, select the Linked Account under which this agency operates. This ties their activities to the main legal entity.